

How To Set Up Iphone 11
Congratulations! You're the proud owner of a new iPhone 11, iPhone 11 Pro, or iPhone 11 Pro Max. You probably want to dive right into the phone the moment you get the box in your hands, but take a beat and do a little prep first! We have a little setup advice you're going to want to pay attention to. Sure, it seems like an unnecessary drag, but this stuff is going to really save you a lot of time and frustration later.
1. Back up and restore
That's right, you're going to want to back up your old iPhoneafter you have your new iPhone 11 in hand, so the backup is as up-to-date as it can possibly be. You can back up via iCloud, in iTunes, or in the Finder.
For a Mac backup (macOS Catalina): Connect your old iPhone to your Mac, open a new Finder window, and select your iPhone in the left column in the Locations section. You'll see a window that looks like the iPhone management window that used to be in iTunes. In the Backups section, choose,Back up all of the data on your iPhone to this Mac. CheckingEncrypt local backup is a good idea, so your account passwords and Health data gets backed up too—just choose a password you won't forget. Click the button toBack up now.
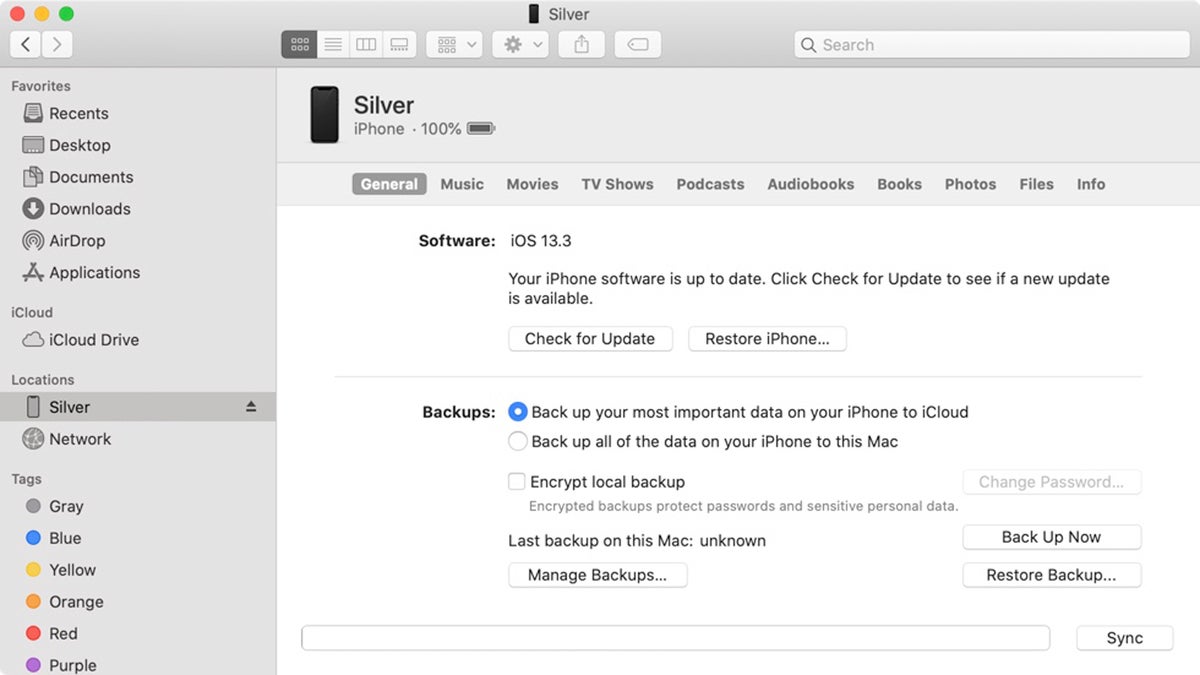 IDG
IDG In macOS Catalina, you can access your iPhone through the Finder.
When the backup is done, connect your new iPhone 11, then tell your Mac you want to restore from the backup you just made. Later, you can switch back to iCloud backups if you prefer, inSettings > iCloud > Backup. But it never hurts to run a backup on your own Mac every now and then.
For a Mac backup (macOS Mojave or older): The backup process is similar to that described above for Catalina, but instead, you use the iTunes app. After you back up your old iPhone, connect your new one. iTunes will take you through the steps for set up.
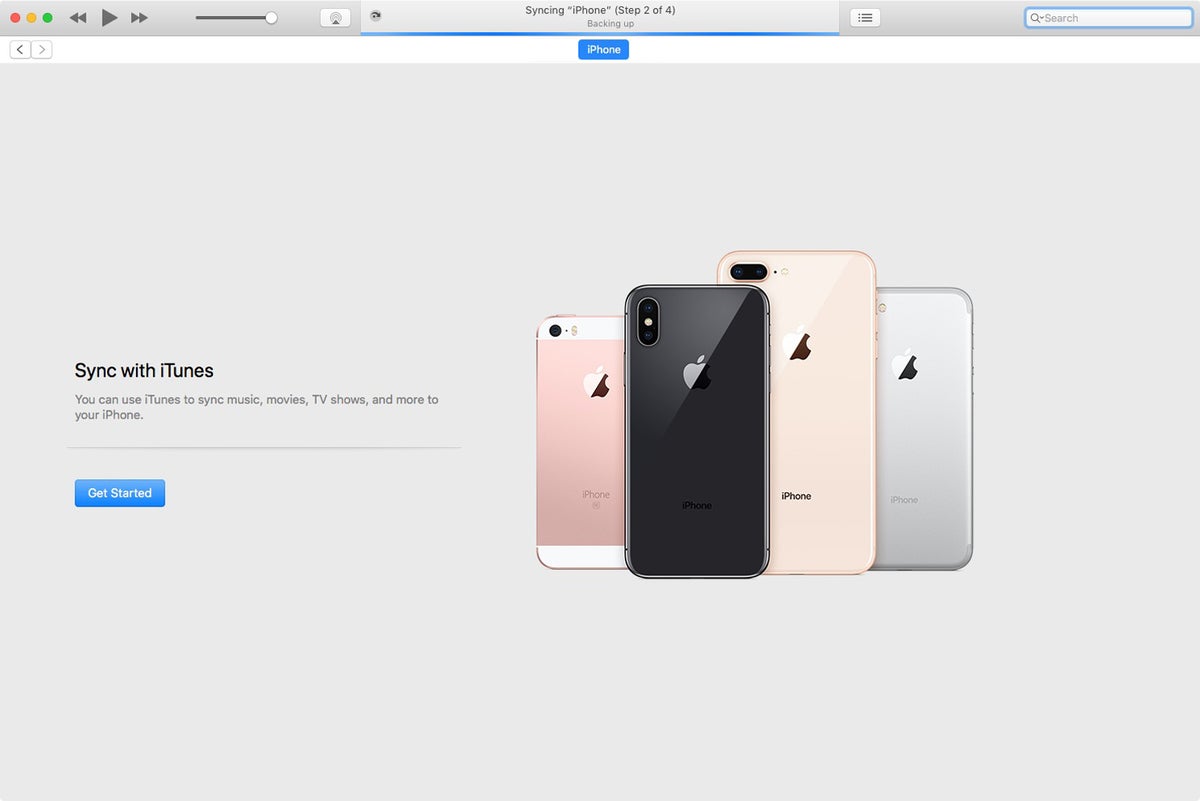 IDG
IDG Use iTunes if you're using a Mac with an operating system older than macOS Catalina.
For an iCloud backup: No need to connect your old iPhone to your Mac. Just launch Settings and tap on your Apple ID profile listing at the top, then go to iCloud > iCloud Backup and select Back up now.
When setting up your new iPhone 11, you can restore your iPhone from this backup once you've logged into your new device with your Apple ID.
If you happen to be coming from an Android phone (hey, welcome to the garden!), there's an Android Move to iOS app that can assist you with getting all of your your Google account data in Mail, Calendars, and Contacts, moving your camera roll over, even transferring your Chrome bookmarks to Safari.
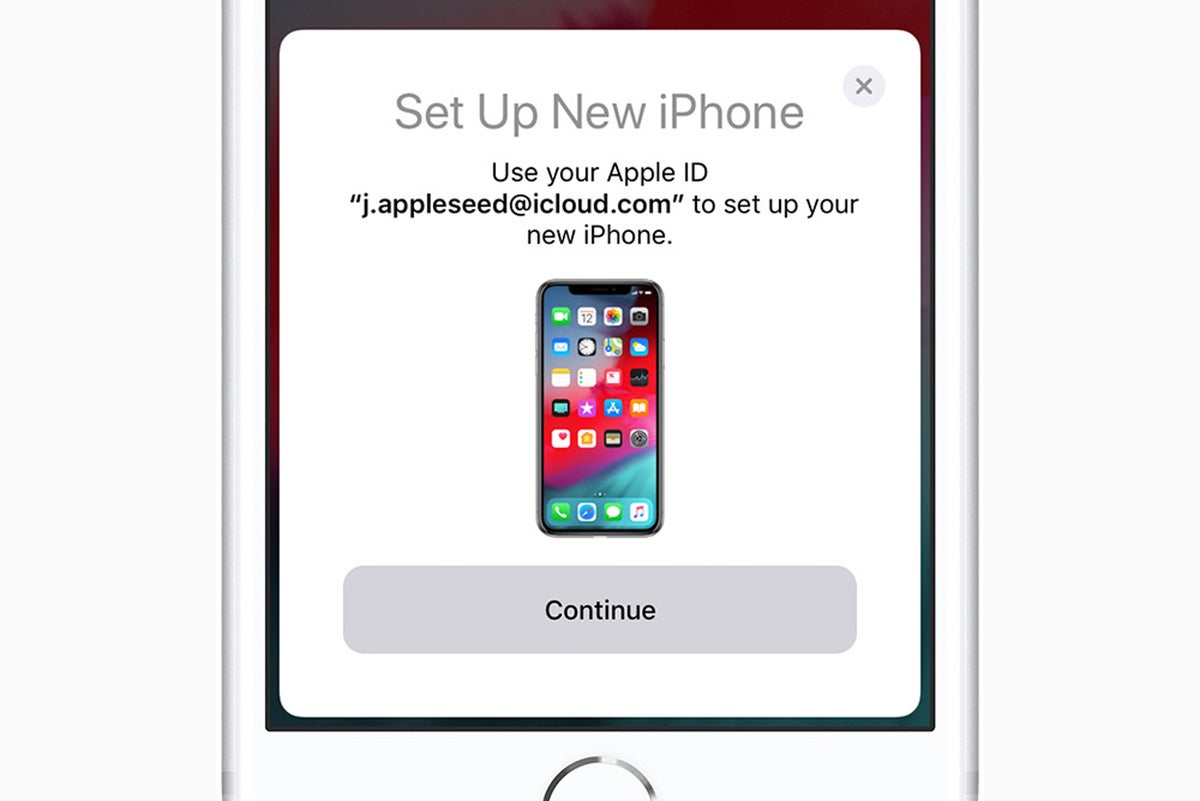
2. Update your old iPhone, then use Quick Start
iOS has a feature called Quick Start. It's practically magic. You just hold your new phone next to your old phone, and a little card pops up asking if you want to transfer all your stuff to the new device. You'll then point your old phone's camera at your new phone (which displays a cloud of little dots) and enter your old phone's 6-digit passcode.
 Apple
Apple Quick Start
You'll go through the rest of the setup process, like enabling Face ID, and then your phone will be ready to go, set up just like your old iPhone. It'll even prompt you to update your old iPhone's backup if it hasn't been backed up in awhile.
Setting up your phone this way transfers over most of your settings, the arrangement of your home screen, and more. It's ahuge time saver. But it requires iOS 11 or newer, so if you haven't updated your old phone to iOS 11 (or to the current version, iOS 13) for some reason, you might want to update right away. You don't want to have to wait through a big update process once you have your iPhone 11 in hand.
After setting up your phone this way, you'll want to give it a few minutes to re-download all your apps. Initially, your phone will show placeholders for your apps, all arranged and stuffed into folders exactly as on your old iPhone. But your new phone has to actually re-download apps, because every time you download an app from the App Store, your phone actually grabs a unique version specifically optimized for that iPhone model. But your user data and settings get transferred over, and that's the important part.
As fast and easy as this is, we still recommend backing up your phone as described in number 1 above. If anything goes really wrong during your setup process, you'll be glad you did!
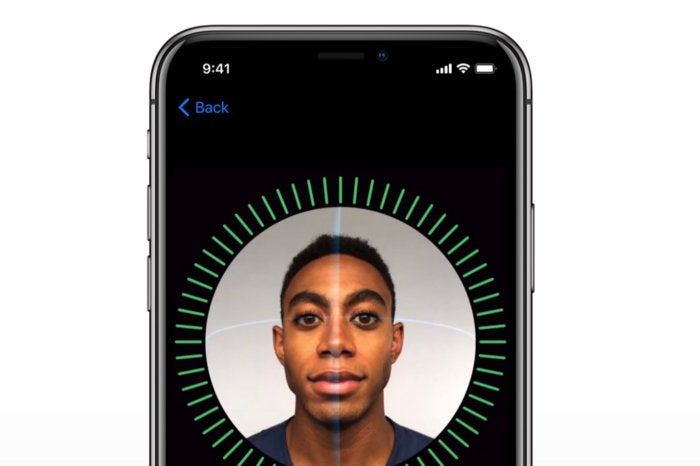
3. Set up Face ID and Apple Pay
Yes, you should use Face ID for maximum security—it's the quickest way to unlock your iPhone 11, and will make it less painful to use a complicated passcode, since you don't have to type it in every time. Setting up Face ID is much faster than Touch ID, too—the setup screen will prompt you and ask you to slowly look around in a circle a couple times. It's a lot quicker than tapping the home button dozens of times to register a fingerprint.
 Apple
Apple Setting up Face ID is a lot faster than Touch ID.
Worried about your privacy with Face ID? Don't be. No photos of your face nor any other biometric data ever leave your phone—Apple doesn't get any of that. And it isn't accessible by other apps, just as other apps weren't able to access your fingerprints with Touch ID. You can read all about it in our Face ID FAQ.
Since you need to have Face ID enabled in order to use Apple Pay, this would be a good time to jump into Apple's Wallet app to set that up. If you're new to Apple Pay, just follow the instructions within Wallet to add a credit card or two. If you already had Apple Pay on your old iPhone, you'll notice that your credit cards have disappeared on your new iPhone. Why? For your security, of course. Your Wallet history will still be there, but you'll have to re-enter any payment cards you'd like to use with Apple Pay. (For more on Apple Pay, check out our complete guide.)
4. Update your apps
Great, now you should be on your home screen on your new iPhone, at last. Hit up the App Store first—you'll want the latest versions of all of your apps. To check for app updates, launch the App Store app, then tap your account icon in the upper right. You'll find an updates section , and you can get the updates here. If you used Quick Setup, most of your apps should be up to date already, so this will be, er, quick.
Don't forget you can have your apps auto-update by flipping the Updates switch inSettings > your Apple ID > iTunes & App Stores. Or, you can manually update your apps and just check out the "What's New" release notes to see what changed.
5. Pair your Apple Watch
If you use an Apple Watch (or maybe you just bought a brand new Apple Watch to go with your future-phone) you'll need to pair it to your new iPhone to keep the Activity data flowing to your Health database, and keep your new phone's notifications flowing to your watch. First you have to unpair your watch from your old iPhone, either in the Apple Watch app on your old iPhone (tap your watch, then the "i" icon, thenUnpair Apple Watch, then enter your iCloud password when prompted), or on the watch itself (Settings > General > Reset).
Then, launch the Apple Watch app on your new iPhone 11, which will walk you through the pairing process including setting a passcode, unlocking behavior, and Apple Pay.
If your Apple Watch isn't already running watchOS 6, you'll want to update it. To upgrade, your Apple Watch needs to be connected to its charger, in range of your iPhone, and at least 50 percent charged. Then look for the Software Update option in the iPhone Watch app. Updating your Apple Watch can be a slow process, so it's a good idea to get started early.
6. Learn the new gestures and commands
As you may have noticed, your iPhone 11 has no home button. Where the Home button used to be, you now have an extra half-inch or so of glorious OLED display!
If you're coming from an iPhone X or XS, it will be totally familiar, of course. But if you're upgrading from an older iPhone, you've got some new gestures to learn.
Here are a few basic commands you'll need to re-learn now that your iPhone is "home free."
Return Home: Just swipe up from the bottom of the screen. Easy!
Jump between apps: Swipe left or right along the bottom edge of the phone to jump back and forth between apps. You can sort of "flick" from the bottom corners, moving your finger up and over, to "bounce" between the apps, or just slide directly side-to-side along the bottom edge.
App switcher: Swipe up from the bottom edge and pause for a second with your finger still on the display. App cards will quickly pop up, and you can lift your finger off and swipe around through them.
Close an app: If you need to kill an app from the app switcher, simply swipe up on it.
Take a screenshot: Simply press the side button and the volume up button at the same time.
There are lots of other new commands and gestures to learn. You're in luck: We have a guide for that!
7. Try out Portrait Lighting
If you're upgrading from a Plus-model iPhone, you already know about Portrait Mode in the camera app. But only the iPhone 8 Plus, X, and XS had Portrait Lighting, which of course continues to be available on the iPhone 11. Just launch the Camera app and select Portrait from the camera modes at the bottom of the screen, and then swipe through the different lighting options.
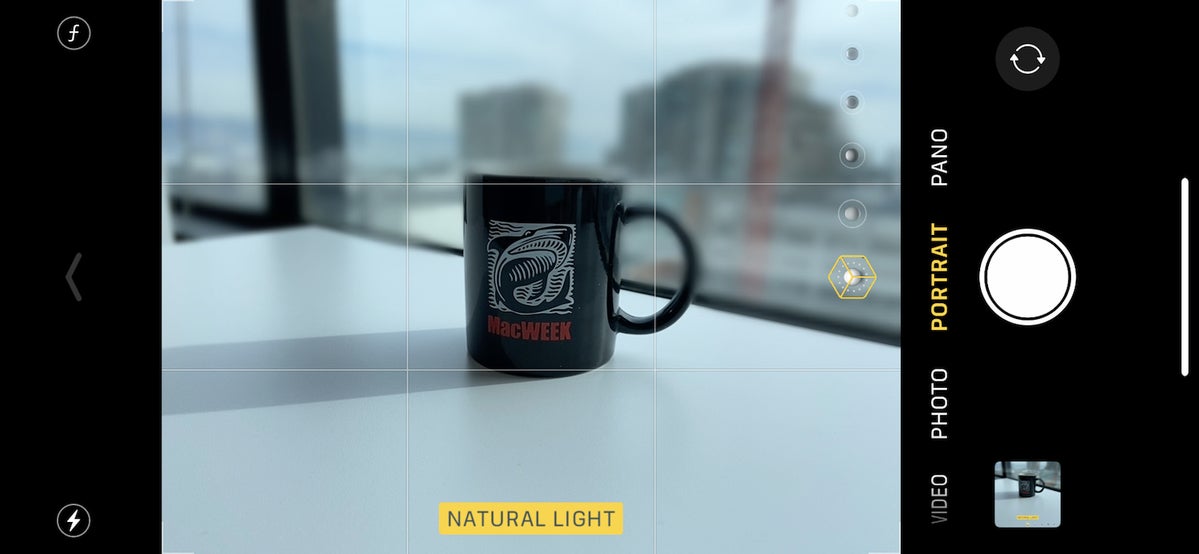 IDG
IDG Portrait Lighting will take your iPhone 11 portrait shots to the next level.
The iPhone X introduced Portrait Mode on the front-facing camera, so unless you're upgrading from that, it will be a new feature for you on the iPhone 11.
8. Charge it up, quick!
There's a reason your new iPhone 11 has that shiny glass back, and that's not because it's a throwback to the iPhone 4. No, that glass back is for wireless charging support. To use this feature, you'll need a compatible wireless charging pad that utilizes the Qi standard (we've tested a bunch, and here are some of our favorites). If you have one of those laying around, all you have to do is set your iPhone onto the pad and watch it start to power up. Say goodbye to the jumble of Lightning cables on your bedside table!
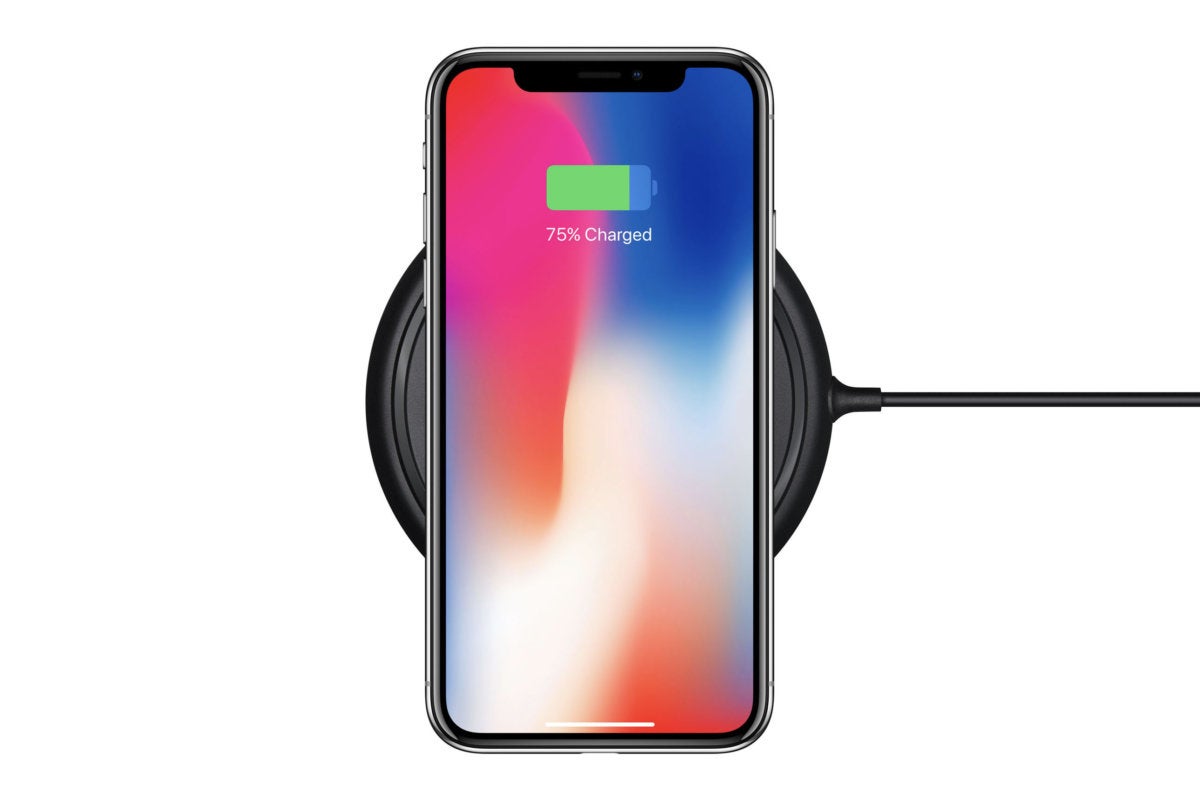 Apple
Apple Of course, you can charge your iPhone 11 via Lightning if you want to. In fact, this is still the fastest way to charge your phone, provided you use the right adapter and cable.
The 11 supports fast charging using the USB-C Power Delivery (USB-PD) standard. If you have an iPhone 11 Pro or 11 Pro Max, Apple includes an 18-watt power adapter. Unfortunately, the power adapter with the iPhone 11 is a 5-watt model. You can use Apple's own 29-watt USB-C power adapter, or the USB-C power adapter for a modern MacBook Pro. But third-party USB-C power adapters should work as well, as long as they support the USB-PD standard. We tested all the official Apple power adapters along with some third-party choices, and found that the 12-watt iPad adapter is the sweet spot between price and performance.
9. Send Animoji to your friends
It's silly, but the best way to brag about your new iPhone is to send someone an iMessage that shows the Poo Emoji perfectly lip-synced and following your facial expressions as you sing "Bohemian Rhapsody." They will beso jealous.
Animoji are found in Messages, as an iMessage app at the bottom of the screen.
 Apple
Apple If you send a singing poo to your friends, they'll know you bought a new iPhone. It's that simple.
10. Make your Memoji
Animoji are cool, but Memoji takes them to the next level. If you're upgrading from an iPhone X, you may have already created a Memoji. If the iPhone 11 is your first iPhone with a the TrueDepth front camera system, it's your first opportunity to build your cartoon avatar.
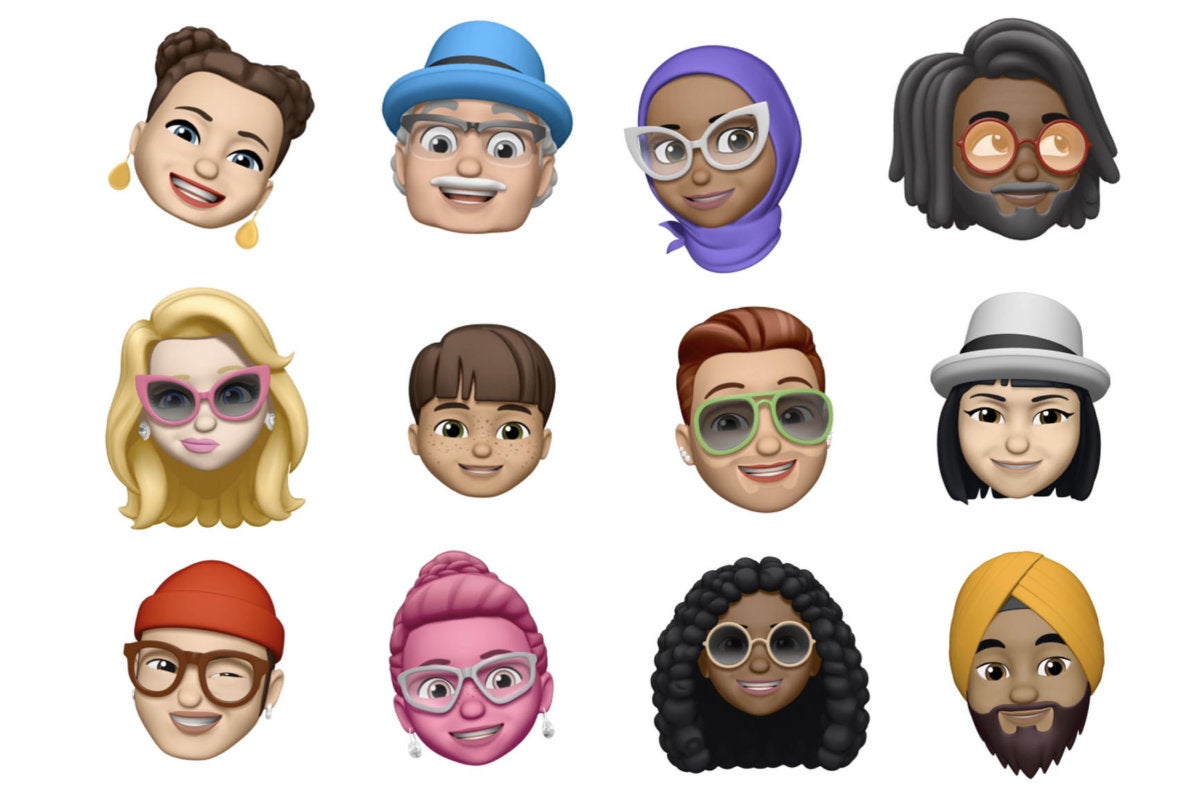 Apple
Apple If the iPhone 11 is your first TrueDepth camera-enabled iPhone, it's time to make your Memoji!
Start by opening the Messages app, and then stating a new message or opening an existing thread. Tap the Animoji icon along the bottom, and then the + sign at the beginning of the Animoji list.
We have a step-by-step Memoji guide to walk you through the process.
How To Set Up Iphone 11
Source: https://www.macworld.com/article/233673/did-you-just-get-your-iphone-11-do-these-10-things-first.html
Posted by: longneckerfroor1994.blogspot.com
0 Response to "How To Set Up Iphone 11"
Post a Comment